If you’re new to cycling, you may or may not have heard the term “bonk.” Bonking sounds like it might be fun, right?
Not quite.
It’s that, sudden moment when your body says, “Nope, we’re done here.” Your legs stop cooperating, your head feels foggy, and you question every life choice that led you to that moment.
I’ve notably bonked once — and I’ll never forget the feeling. We were on a weekend cycle tour on the Sunshine Coast. The distance wasn’t much more than we’d been doing usually, but the route was significantly hillier. By the time we arrived at our accommodation, I was exhausted, shaky, and irrationally angry at Mark. My body felt heavy. I barely wanted to shower, let alone have dinner, and enjoy the view.
The route wasn’t the primary issue. We made a few mistakes:
- It was hot out – I didn’t drink enough water, and we had a cider flight.
- We had the wrong kind of lunch – heavy and protein-focused.
- We didn’t snack during the ride.
All that to say, this post is about fueling on the bike to ensure a successful ride (and not a bonk).
Okay, so what is “bonking” really?
It is when your body runs out of glycogen — your body’s main source of energy during endurance exercise. Cycling, especially longer rides, burns through carbohydrates. Once those stores are gone, your blood sugar drops, your brain fogs up, and your legs feel like cement.
It’s like trying to keep your car going with no gas in the tank. You can’t just “push through” a bonk — your body literally doesn’t have the energy to keep going. The only cure is carbs. This is why learning about and planning for fueling on the bike is an important part of beginner cycling.
Carbs Are Your Friend
There’s a misconception — especially among women — that carbs are the enemy. But on the bike, they’re your best friend.
Your muscles rely on carbohydrates for quick, efficient energy. Without them, you’ll fatigue faster, recover slower, and risk bonking mid-ride.
Cycling is not the time to “cut carbs” — it’s the time to embrace them (yay!).
I used to have this idea that fueling mid-ride was “cheating” — that if I was really fit, I shouldn’t need it. That couldn’t be further from the truth.
Fueling on the bike isn’t a weakness. It’s what lets you ride stronger, longer, and actually enjoy it. According to the wise words of Mark – “fast rides are not fasted rides.”
Fueling right is part of my cycling toolkit — right up there with shifting gears and pacing.

The Fueling Timeline
Think of fueling in three phases: before, during, and after your ride.
Hot tip – don’t try new foods/supplements before important rides – you don’t want an upset stomach or worse during an event.
Before Your Ride: Load Up Smartly
2–3 hours before:
Eat a balanced meal with carbs + some protein and fat. But focus on carbs.
You’re filling your glycogen stores and setting yourself up for steady energy.
Examples:
- Oatmeal with peanut butter and fried fruit
- Toast with peanut butter
- Smoothie with fruit and yogurt
30–60 minutes before:
If you didn’t eat much earlier, grab a light, easily digestible carb snack — a banana, small granola bar, or toast with jam.


During the Ride: Feed the Machine
This is where most new cyclists go wrong — they wait until they’re hungry or tired to eat. By that point, it’s too late.
Ideally, nibbling every 20–30 minutes will keep consistent energy levels. During our Fondo ride, I had the gummy bears in my leg pocket so I could reach down easily and snack. Sometimes this isn’t feasible and you need to stop to fuel, which is fine, just make sure you do this within the first 45-60 minutes of your ride, even if you don’t feel like you need to. Mark tries to keep to a strict 45-minute fueling schedule, especially for long rides. I find I lean more towards the 60-minute timeline – especially if I’ve been drafting and letting him do the majority of the work.
A general rule of thumb is to aim for a minimum of 30 g/hr up to 90 g/hr. Fueling is more critical the longer and more intense your rides become. There are precise ways to plan your intake, but it also involves discussing training efforts or zones, so I am saving this for a future ‘Training’ post. It’ll take a bit to find your ideal balance of carb intake for time and effort. But the bottom line – plan to snack during your ride.
What works for me:
- Candy (gummy bears or Coke bottles, no sour candies because they can be hard on your mouth — easy, fun, and fast sugar)
- Skratch Labs drink mix (hydration + carbs + electrolytes)
- A small granola bar or fruit bars or dried fruit – Sunrype, Kashi
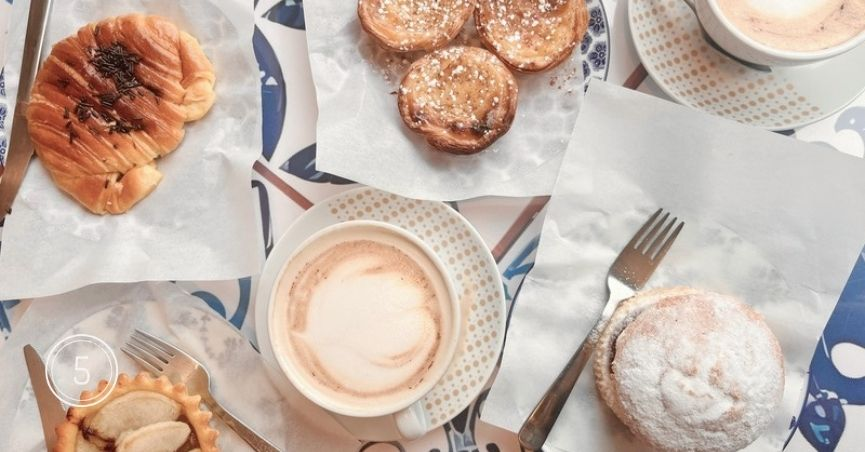
- A pastry from the coffee shop you stopped at
- Occasionally, an energy gel/chew if it’s a long ride, race or climb day

Caffeine
Caffeine is one of the most well-proven legal performance aids in sports; many pre-workout supplements contain caffeine. How it works:
- reduces perceived exertion (it literally makes the same workload feel easier)
- increases alertness + focus (better for pack riding / descending / cornering)
- helps mobilize fat as fuel → which means your body can spare glycogen a bit longer
- can help you push higher power at the same HR
Coffee/caffeine contributes to morale and energy—but it is neither fuel nor a source of hydration.
Note: Many of the fueling options contain a lot of sugar (obviously, carbs) as well as caffeine, such as energy gels. Turns out women are slightly more sensitive to GI side effects and feelings of anxiety from caffeine. I got to experience this three-quarters of the way through our century ride. I was experiencing an awful stomachache and nausea – we had to stop at a convenience store to purchase Tums and a Ginger Ale. What I learned – striking a balance between sugar and caffeine with real food is best for me. So, make sure you know how much caffeine you are consuming along with your carbs. Also, it doesn’t hurt to bring some Tums.
Note 2: Caffeine has a half-life of around 5 hours (the time it takes to be half depleted), so be cautious with caffeine on later afternoon rides as it could impact sleep.
After the Ride: Refill and Recover
Once you hop off the bike, your body’s priority is to rebuild glycogen and repair muscles. Try to eat something with carbs and protein within 30–60 minutes.
My post-ride favourites:
- Smoothie with banana, yogurt, and protein powder
- Eggs with toast and fruit
- A protein bowl of some sort with rice, veggies and protein
- Baked beans & wieners
And don’t forget hydration — keep sipping water or electrolytes until your pee is pale yellow (gross but true).


Hydration Matters More Than You Think
Dehydration will zap your performance faster than almost anything else.
Aim for 500–1000 mL of fluid per hour, depending on heat, humidity, and sweat rate.
If you’re sweating a lot, make sure your drink includes electrolytes (sodium, potassium, magnesium). Skratch Labs, Nuun, or Precision Hydration all make great options without that fake “sports drink” taste.
We usually do one water bottle of just water and one of electrolytes.
Tip – do not try electrolyte mixes for the first time on an important ride (race) or a long ride. You don’t want to have an upset stomach when it matters.


Final Thoughts
So, the next time you head out, pack the gummies, mix the electrolytes, and start snacking before your body asks for it.
I would love to hear about your less-than-ideal or first bonking moments – share them in the comments!
Pin me for later reading…

Other posts in this series:

From Running Shoes to Pedals: How I Fell in Love with Cycling

Cycling Gear 101: What You Actually Need (and What You Don’t)

Understanding your Road Bike Gears & Cadence

10 Tips for Beginner Cycling Route Planning

8 Tips for Building Mental Toughness on the Bike

Beginner Bike Maintenance: Pre-Ride Checks
You might want to read these other cycling posts:


Leave a Reply